WordPress Notifications Made Easy

Email Newsletter
Weekly tips on front-end & UX.
Trusted by 200,000+ folks.
 Flexible CMS. Headless & API 1st


 Register!
WordPress doesn’t offer any kind of notification system. All you can use is the wp_mail() function, but all of the settings have to be hardcoded, or else you have to create a separate settings screen to allow the user tweak the options. It takes many hours to write a system that is reliable, configurable and easy to use. But not anymore. I’ll show you how to create your own notification system within minutes with the free Notification plugin. By notification, I mean any kind of notification. Most of the time, it will be email, but with the plugin we’ll be using, you can also send webhooks and other kinds of notifications.
While creating a project for one of my clients, I encountered this problem I’ve described. The requirement was to have multiple custom email alerts with configurable content. Instead of hardcoding each and every alert, I decided to build a system. I wanted it to be very flexible, and the aim was to be able to code new scenarios as quickly as possible.
The code I wrote was the start of a great development journey. It turned out that the system I created was flexible enough that it could work as a separate package. This is how the Notification plugin was born.
Suppose you want to send an email about a user profile being updated by one of your website’s members. WordPress doesn’t provide that functionality, but with the Notification plugin, you can create such an email in minutes. Or suppose you want to synchronize your WooCommerce products with third-party software by sending a webhook to a separate URL every time a new product is published. That’s easy to do with the plugin, too.
Lessons Learned While Developing WordPress Plugins
Good plugin development and support lead to more downloads. More downloads mean more money and a better reputation. Learn how you can develop good-quality products with seven golden rules. Read a related article →
In this article, you’ll learn how to integrate the plugin in your own application and how to create an advanced WordPress notification system more quickly and easily than ever.
In this article, we’ll cover:
- how to install the plugin,
- the idea behind the plugin and its architecture,
- creating a custom scenario for notifications,
- creating the action (step 1 of the process),
- creating the trigger (step 2 of the process),
- creating the custom notification type,
- how to enable white-label mode and bundle the plugin in your package.
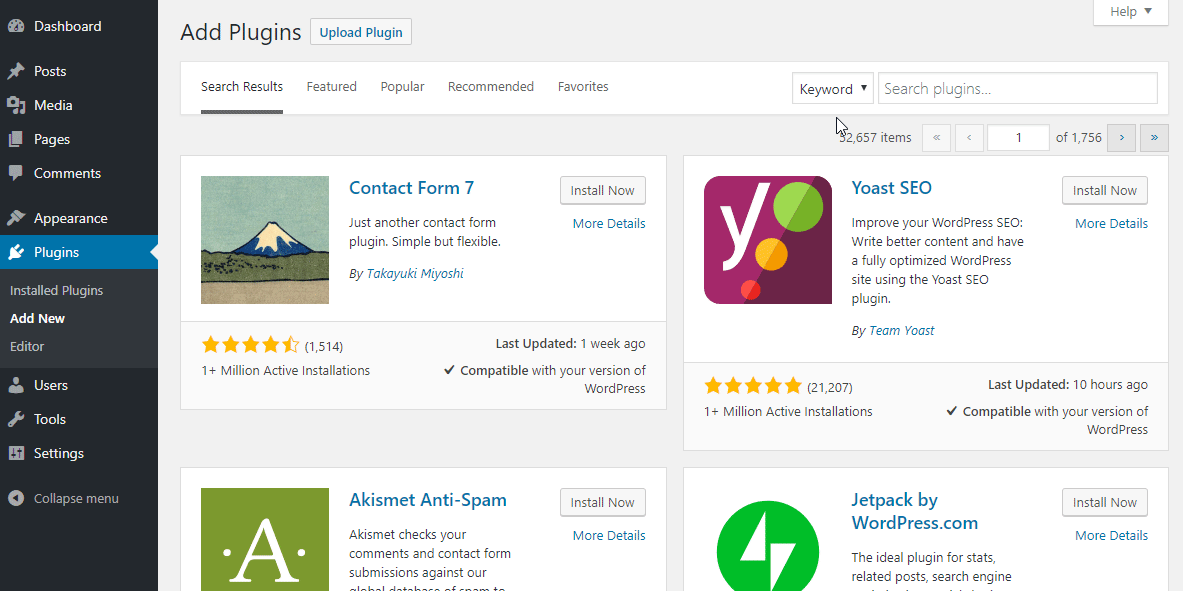
Installing The Plugin
To create your own scenarios, you are going to need the Notification plugin. Just install it from the WordPress.org repository in your WordPress dashboard, or download it from the GitHub repository.
Later in the article, you’ll learn how to hide this plugin from your clients and make it work as an integrated part of your plugin or theme.
The Idea Of The Plugin
Before going into your code editor, you’ll need to know what the plugin’s architecture looks like. The plugin contains many various components, but its core is really a few abstract classes.
The main components are:
- The notification
This could be an email, webhook, push notification or SMS. - The trigger
This is what sends the notification. It’s effectively the WordPress action. - The merge tag
This is a small portion of the dynamic content, like{post_title}.
To give you a better idea of how it all plays together, you can watch this short video:
The core of the Notification plugin is really just an API. All of the default triggers, like Post published and User registered are things built on top of that API.
Because the plugin was created for developers, adding your own triggers is very easy. All that’s required is a WordPress action, which is just a single line of code and a class declaration.
Custom Scenario
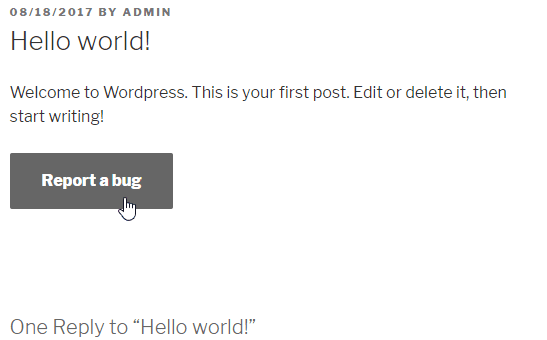
Let’s devise a simple scenario. We’ll add a text area and button to the bottom of each post, allowing bugs in the article to be reported. Then, we’ll trigger the notification upon submission of the form.
This scenario was covered in another article, “Submitting Forms Without Reloading the Page: AJAX Implementation in WordPress”.
For simplicity, let’s make it a static form, but there’s no problem putting the action in an AJAX handler, instead of in the wp_mail() function.
Let’s create the form.
The Form
add_filter( 'the_content', 'report_a_bug_form' );
function report_a_bug_form( $content ) {

    // Display the form only on posts.
    if ( ! is_single() ) {
        return $content;
    }

    // Add the form to the bottom of the content.
    $content .= '<form action="' . admin_url( 'admin-post.php' ) . '" method="POST">
        <input type="hidden" name="post_id" value="' . get_ID() . '">
        <input type="hidden" name="action" value="report_a_bug">
        <textarea name="message" placeholder="' . __( 'Describe what\'s wrong...', 'reportabug' ) . '"></textarea>
        <button>' . __( 'Report a bug', 'reportabug' ) . '</button>
    </div>';

    return $content;

}
Please note that many components are missing, like WordPress nonces, error-handling and display of the action’s result, but these are not the subject of this article. To better understand how to handle these actions, please read the article mentioned above.
Preparing The Action
To trigger the notification, we are going to need just a single action. This doesn’t have to be a custom action like the one below. You can use any of the actions already registered in WordPress core or another plugin.
The Form Handler And Action
add_action( 'admin_post_report_a_bug', 'report_a_bug_handler' );
add_action( 'admin_post_nopriv_report_a_bug', 'report_a_bug_handler' );
function report_a_bug_handler() {

    do_action( 'report_a_bug', $_POST['post_id'], $_POST['message'] );

    // Redirect back to the article.
    wp_safe_redirect( get_permalink( $_POST['post_id'] ) );
    exit;

}
You can read more on how to use the admin-post.php file in the WordPress Codex.
This is all we need to create a custom, configurable notification. Let’s create the trigger.
Registering The Custom Trigger
The trigger is just a simple class that extends the abstract trigger. The abstract class does all of the work for you. It puts the trigger in the list, and it handles the notifications and merge tags.
Let’s start with the trigger declaration.
Minimal Trigger Definition
class ReportBug extends \BracketSpace\Notification\Abstracts\Trigger {

    public function __construct() {

        // Add slug and the title.
        parent::__construct(
            'reportabug',
            __( 'Bug report sent', 'reportabug' )
        );

        // Hook to the action.
        $this->add_action( 'report_a_bug', 10, 2 );

    }

    public function merge_tags() {}

}
All you need to do is call the parent constructor and pass the trigger slug and nice name.
Then, we can hook into our custom action. The add_action method is very similar to the add_action() function; so, the second parameter is the priority, and the last one is the number of arguments. Only the callback parameter is missing because the abstract class does that for us.
Having the class, we can register it as our new trigger.
register_trigger( new ReportBug() );
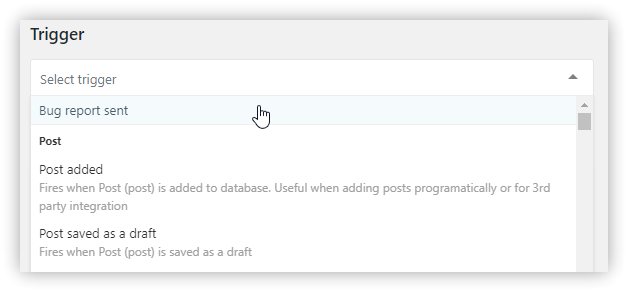
This is now a fully working trigger. You can select it from the list when composing a new notification.
Although the trigger is working and we can already send the notification we want, it’s not very useful. We don’t have any way to show the recipient which post has a bug and what the message is.
This would be the time, then, to register some merge tags and set up the trigger context with the action parameters we have: the post ID and the message.
To do this, we can add another method to the trigger class. This is the action callback, where we can catch the action arguments.
Handling Action Arguments
public function action( $post_ID, $message ) {

    // If the message is empty, don't send any notifications.
    if ( empty( $message ) ) {
        return false;
    }

    // Set the trigger properties.
    $this->post    = get_post( $post_ID );
    $this->message = $message;

}
Note the return false; statement. If you return false from this method, the trigger will be stopped, and no notification will be sent. In our case, we don’t want a notification to be submitted with an empty message. In the real world, you’d want to validate that before the form is sent.
Then, we just set the trigger class’ properties, the complete post object and the message. Now, we can use them to add some merge tags to our trigger. We can just fill the content of the merge_tags method we declared earlier.
Defining Merge Tags
public function merge_tags() {

    $this->add_merge_tag( new \BracketSpace\Notification\Defaults\MergeTag\UrlTag( array(
        'slug'        => 'post_url',
        'name'        => __( 'Post URL', 'reportabug' ),
        'resolver'    => function( $trigger ) {
            return get_permalink( $trigger->post->ID );
        },
    ) ) );

    $this->add_merge_tag( new \BracketSpace\Notification\Defaults\MergeTag\StringTag( array(
        'slug'        => 'post_title',
        'name'        => __( 'Post title', 'reportabug' ),
        'resolver'    => function( $trigger ) {
            return $trigger->post->post_title;
        },
    ) ) );

    $this->add_merge_tag( new \BracketSpace\Notification\Defaults\MergeTag\HtmlTag( array(
        'slug'        => 'message',
        'name'        => __( 'Message', 'reportabug' ),
        'resolver'    => function( $trigger ) {
            return nl2br( $trigger->message );
        },
    ) ) );

    $this->add_merge_tag( new \BracketSpace\Notification\Defaults\MergeTag\EmailTag( array(
        'slug'        => 'post_author_email',
        'name'        => __( 'Post author email', 'reportabug' ),
        'resolver'    => function( $trigger ) {
            $author = get_userdata( $trigger->post->post_author );
            return $author->user_email;
        },
    ) ) );

}
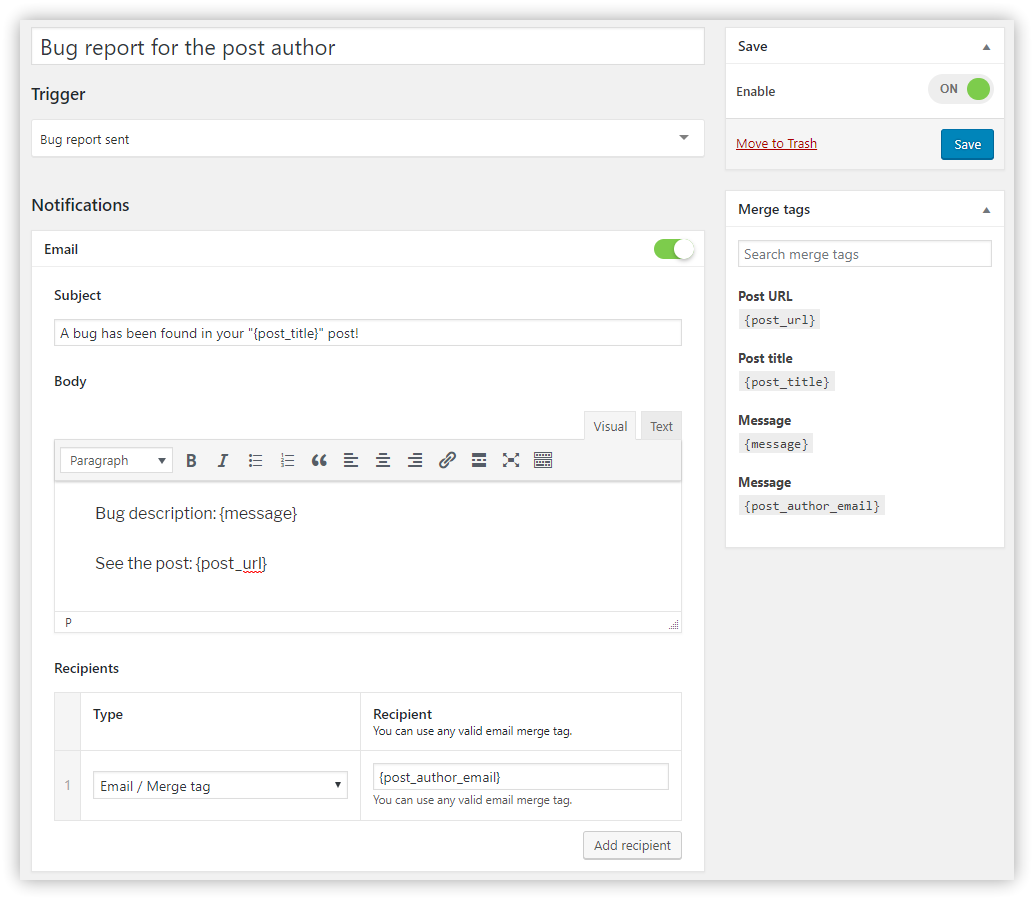
This will add four merge tags, all ready to use while a notification is being composed.
The merge tag is an instance of a special class. You can see that there are many types of these tags, and we are using them depending on the value that is returned from the resolver.
All merge tags are added via the add_merge_tag method, and they require the config array with three keys:
- slug
The static value that will be used in the notification (i.e.{post_url}). - name
The translated label for the merge tag. - resolver
The function that replaces the merge tag with the actual value.
The resolver doesn’t have to be the closure, as in our case, but using it is convenient. You can pass a function name as a string or an array if this is a method in another class.
In the resolver function, only one argument is available: the trigger class instance. Thus, we can access the properties we just set in the action method and return the value we need.
And that’s all! The merge tags are not available to use with our trigger, and we can set up as many notifications of the bug report as we want.
Creating The Custom Notification Type
The Notification plugin offers not only custom triggers, but also custom notification types. The plugin ships with two types, email and webhook, but it has a simple API to register your own notifications.
It works very similarly to the custom trigger: You also need a class and a call to one simple function to register it.
I’m showing only an example; the implementation will vary according to the system you wish to integrate. You might need to include a third-party library and call its API or operate in WordPress’ file system, but the guide below will set you up with the basic process.
Let’s start with a class declaration:
class CustomNotification extends \BracketSpace\Notification\Abstracts\Notification {

    public function __construct() {

        // Add slug and the title.
        parent::__construct(
            'custom_notification',
            __( 'Custom Notification', 'textdomain' )
        );

    }

    public function form_fields() {}

    public function send( \BracketSpace\Notification\Interfaces\Triggerable $trigger ) {}

}
In the constructor, you must call the parent’s class constructor and pass the slug and nice name of the notification.
The form_fields method is used to create a configuration form for notifications. (For example, the email notification would have a subject, body, etc.)
The send method is called by the trigger, and it’s where you can call the third-party API that you wish to integrate with.
Next, you have to register it with the register_notification function.
register_trigger( new CustomNotification() );
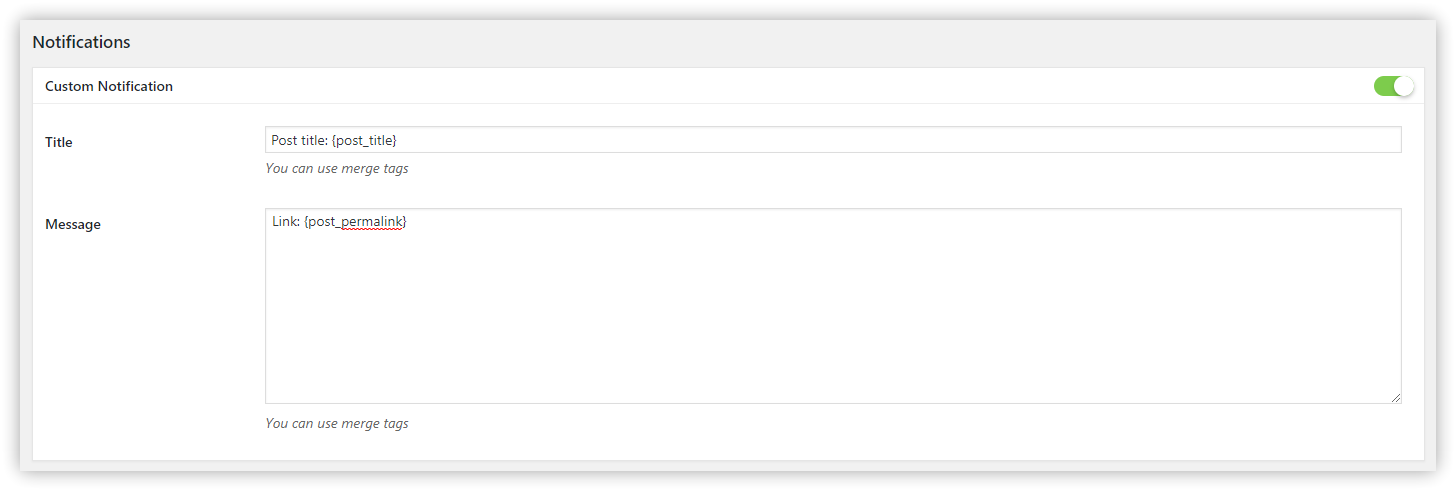
The Notification Form
There might be a case in which you have a notification with no configuration fields. That’s fine, but most likely you’ll want to give the WordPress administrator a way to configure the notification content with the merge tags.
That’s why we’ll register two fields, the title and the message, in the form_fields method. It looks like this:
public function form_fields() {

    $this->add_form_field( new \BracketSpace\Notification\Defaults\Field\InputField( array(
        'label'       => __( 'Title', 'textdomain' ),
        'name'        => 'title',
        'resolvable'  => true,
        'description' => __( 'You can use merge tags', 'textdomain' ),
    ) ) );

    $this->add_form_field( new \BracketSpace\Notification\Defaults\Field\TextareaField( array(
        'label'       => __( 'Message', 'textdomain' ),
        'name'        => 'message',
        'resolvable'  => true,
        'description' => __( 'You can use merge tags', 'textdomain' ),
    ) ) );

}
As you can see, each field is an object and is registered with the add_form_field method.
Each field has the translatable label, the unique name and a set of other properties. You can define whether the field should be resolved with the merge tags with the resolvable key. This means that when someone uses the {post_title} merge tag in this field, it will be changed with the post’s actual title. You can also provide the description field for a better user experience.
At this point, your custom notification type can be used in the plugin’s interface with any available trigger type.
Sending The Custom Notification
In order to make it really work, we have to use the send method in our notification class declaration. This is the place where you can write an API call or use WordPress’ file system or any WordPress API, and do whatever you like with the notification data.
This is how you can access it:
public function send( \BracketSpace\Notification\Interfaces\Triggerable $trigger ) {

    $title   = $this->data['title'];
    $message = $this->data['message'];

    // @todo Write the integration here.

}
At this point, all of the fields are resolved with the merge tags, which means the variables are ready to be shipped.
That gives you endless possibilities to integrate WordPress with any service, whether it’s your local SMS provider, another WordPress installation or any external API you wish to communicate with.
White Labeling And Bundling The Plugin
It’s not ideal to create a dependency of a plugin that can be easily deactivated and uninstalled. If you are building a system that really requires the Notification plugin to be always available, you can bundle the plugin in your own code.
If you’ve used the Advanced Custom Fields plugin before, then you are probably familiar with the bundling procedure. Just copy the plugin’s files to your plugin or theme, and invoke the plugin manually.
The Notification plugin works very similarly, but invoking the plugin is much simpler than with Advanced Custom Fields.
Just copy the plugin’s files, and require one file to make it work.
require_once( 'path/to/plugin/notification/load.php' );
The plugin will figure out its location and the URLs.
But bundling the plugin might not be enough. Perhaps you need to completely hide that you are using this third-party solution. This is why the Notification plugin comes with a white-label mode, which you can activate at any time.
It also is enabled as a single call to a function:
notification_whitelabel( array(
    // Admin page hook under which the Notifications will be displayed.
    'page_hook'       => 'edit.php?post_type=page',
    // If display extensions page.
    'extensions'      => false,
    // If display settings page.
    'settings'        => false,
    // Limit settings access to user IDs.
    // This works only if settings are enabled.
    'settings_access' => array( 123, 456 ),
) );
By default, calling this function will hide all of the default triggers.
Using both techniques, white labeling and bundling, will completely hide any references to the plugin’s origin, and the solution will behave as a fully integrated part of your system.
Conclusion
The Notification plugin is an all-in-one solution for any custom WordPress notification system. It’s extremely easy to configure, and it works out of the box. All of the triggers that are registered will work with any notification type, and if you have any advanced requirements, you can save some time by using an existing extension.
If you’d like to learn more details and advanced techniques, go to the documentation website.
I’m always open to new ideas, so if you have any, you can reach out to me here in the comments, via the GitHub issues or on Twitter.
Download the plugin from the repository, and give it a try!
Further Reading
- Internationalization In Vue With The Vue I18n Plugin
- How To Book More Appointments And Events With A WordPress Booking Plugin
- Developing A Custom Plugin For October CMS
- Useful Figma Plugins And Tools


