How To Build A Real-Time Commenting System

Email Newsletter
Weekly tips on front-end & UX.
Trusted by 200,000+ folks.
 Flexible CMS. Headless & API 1st


Adding real-time functionality to an application can result in a more interactive and engaging user experience. However, setting up and maintaining the server-side real-time components can be an unwanted distraction. But don’t worry, there is a solution.
Cloud hosted Web services and APIs have come to the rescue of many a developer over the past few years, and real-time functionality is no different. The focus at Pusher, for example, is to let you concentrate on building your real-time Web applications by offering a hosted API which makes it quick and easy to add scalable real-time functionality to Web and mobile apps.
Further Reading on SmashingMag:
- Improve User Experience With Real-Time Features
- Real-Time Data And A More Personalized Web
- Building A Real-Time Retrospective Board With Video Chat
- Where Have All The Comments Gone?
In this tutorial, I’ll show how to convert a basic blog commenting system into a real-time engaging experience where you’ll see a comment made in one browser window “magically” appear in a second window.
Why Should We Care About The Real-Time Web?
Although the Real-Time Web is a relatively recent mainstream phrase, real-time Web technologies have been around for over 10 years. They were mainly used by companies building software targeted at the financial services sector or in Web chat applications. These initial solutions were classed as “hacks”. In 2006 these solutions were given an umbrella term called Comet, but even with a defined name the solutions were still considered hacks. So, what’s changed?
In my opinion there are a number of factors that have moved real-time Web technologies to the forefront of Web application development.
Social Media Data
Social media, and specifically Twitter, has meant that more and more data is becoming instantly available. Gone are the days where we have to wait an eternity for Google to find our data (blog posts, status updates, images). There are now platforms that not only make our data instantly discoverable but also instantly deliver it to those who have declared an interest. This idea of Publish/Subscribe is core to the real-time Web, especially when building Web applications.
Increased User Expectations
As more users moved to using applications such as Twitter and Facebook, and the user experiences that they deliver, their perception of what can be expected from a Web application changed. Although applications had become more dynamic through the use of JavaScript, the experiences were seldom truly interactive. Facebook, with it’s real-time wall (and later other realtime features) and Twitter with it’s activity stream centric user interface, and focus on conversation, demonstrated how Web applications could be highly engaging.
WebSockets
![]()
Earlier on I stated that previous solutions to let servers instantly push data to Web browsers were considered “hacks”. But this didn’t remove the fact that there was a requirement to be able to do this in a cross-browser and standardised way. Our prayers have finally been answered with HTML5 WebSockets. WebSockets represent a stardardized API and protocol that allows realtime server and client (web browser) two way communication over a single connection. Older solutions could only achieve two-way communication using two connections so the fact the WebSockets use a single connection is actually a big deal. It can be a massive resource saving to the server and client, with the latter being particularly important for mobile devices where battery power is extremely valuable.
How are Real-Time Technologies being used?
Real-time Web technologies are making it possible to build all sorts of engaging functionality, leading to improved user experiences. Here are a handful of common use cases:
- Realtime Stats - The technology was first used in finance to show stock exchange information so it’s no surprise that the technology is now used more than ever. It’s also highly beneficial to sports, betting and analytics.
- Notifications - when something a user is interested in becomes available or changes.
- Activity Streams - streams of friend or project activity. This is commonly seen in apps like Twitter, Facebook, Trello, Quora and many more.
- Chat - the 101 or real-time Web technology but still a very valuable function. It helps delivery instant interaction between friends, work colleagues, customers and customer service etc.
- Collaboration - Google docs offers this kind of functionality within its docs, spreadsheets and drawing applications and we’re going to see similar use cases in many more applications.
- Multiplayer Games - The ability to instantly deliver player moves, game state changes and score updates is clearly important to multiplayer gaming.
In the rest of this tutorial I’ll cover building a basic blog commenting system, how to progressively enhance it using jQuery and finally I’ll also progressively enhance it using the real-time Web service I work for, Pusher, which will demonstrate not just how easy it can be to use real-time Web technology, but also the value and increased engagement that a real-time factor can introduce.
Creating Generic Blog Commenting System
Start from a Template
I want to focus on adding real-time commenting to a blog post so let’s start from a template.
This template re-uses the HTML5 layout defined in the post on Coding An HTML 5 Layout From Scratch and the file structure we’ll start with is as follows (with some additions that we don’t need to worry about at the moment):
- css (dir)
- global-forms.css
- main.css
- reset.css
- images (dir)
- index.php
HTML
The template HTML, found in index.php, has been changed from the HTML5 Layout article to focus on the content being a blog post with comments. You can view the HTML source here.
The main elements to be aware of are:
<section id="content">- the blog post content<section id="comments">- where the comments are to appear. This is where the majority of our work will be done
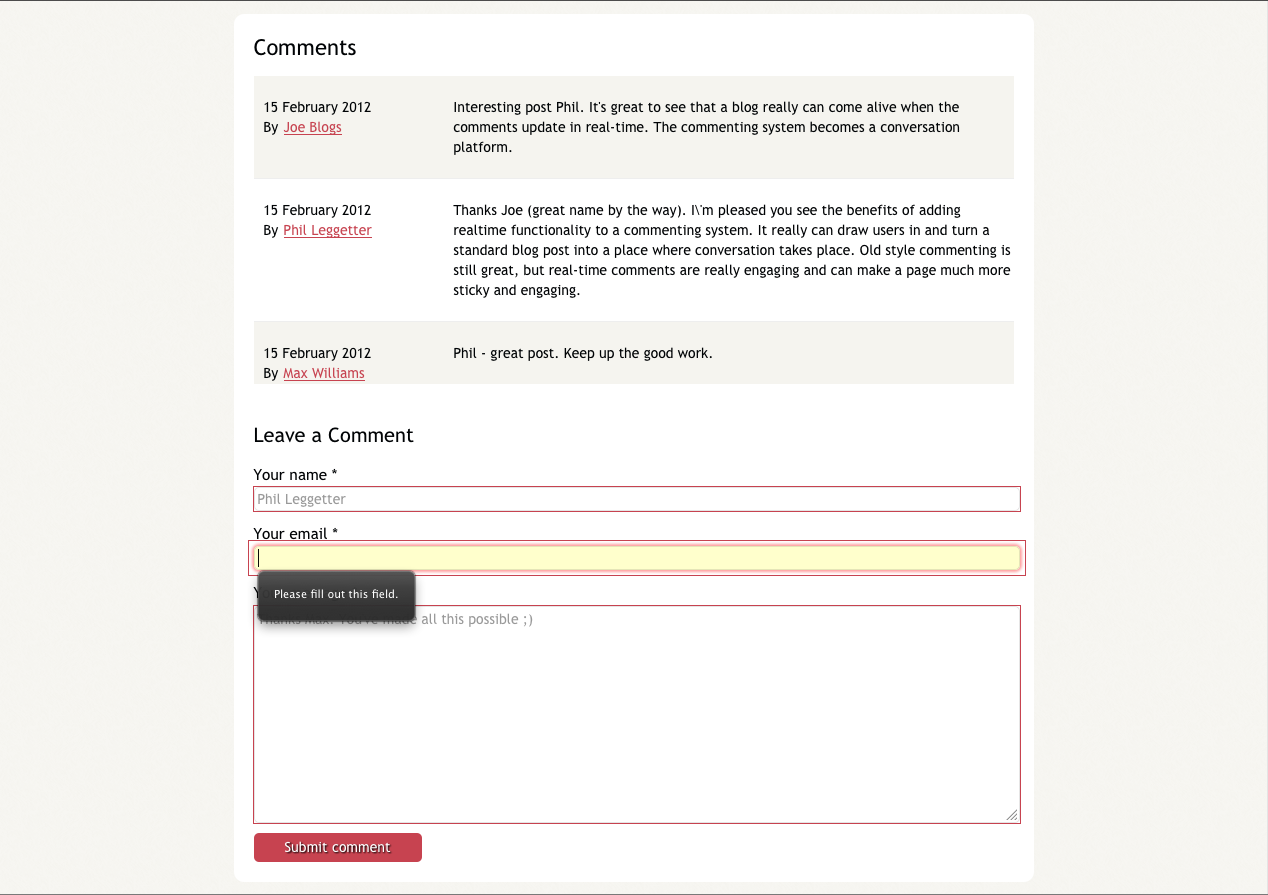
Comments
Now that we’ve got the HTML in place for our blog post and for displaying the comments we also need a way for our readers to submit comments, so let’s add a <form> element to collect and submit the comment details to post_comment.php. We’ll add this at the end of the <section id="comments"> section wrapped in a <div id="respond">.
<div id="respond">

  <h3>Leave a Comment</h3>

  <form action="post_comment.php" method="post" id="commentform">

    <label for="comment_author" class="required">Your name</label>
    <input type="text" name="comment_author" id="comment_author" value="" tabindex="1" required="required">

    <label for="email" class="required">Your email;</label>
    <input type="email" name="email" id="email" value="" tabindex="2" required="required">

    <label for="comment" class="required">Your message</label>
    <textarea name="comment" id="comment" rows="10" tabindex="4"  required="required"></textarea>

    <-- comment_post_ID value hard-coded as 1 -->
    <input type="hidden" name="comment_post_ID" value="1" id="comment_post_ID" />
    <input name="submit" type="submit" value="Submit comment" />

  </form>

</div>
Comment Form CSS
Let’s apply some CSS to make things look a bit nicer by adding the following to main.css:
#respond {
  margin-top: 40px;
}

#respond input[type='text'],
#respond input[type='email'],
#respond textarea {
  margin-bottom: 10px;
  display: block;
  width: 100%;

  border: 1px solid rgba(0, 0, 0, 0.1);
  -webkit-border-radius: 5px;
  -moz-border-radius: 5px;
  -o-border-radius: 5px;
  -ms-border-radius: 5px;
  -khtml-border-radius: 5px;
  border-radius: 5px;

  line-height: 1.4em;
}
Once the HTML structure, the comment form and the CSS are in place our blogging system has started to look a bit more presentable.

Handling Comment Submission
The next step is to write the PHP form submission handler which accepts the request and stores the comment, post_comment.php. You should create this file in the root of your application.
As I said earlier I’m keen to focus on the real-time functionality so a class exists within the template that you’ve downloaded which encapsulate some of the standard data checking and persistence functionality. This class is defined in Persistence.php (you can view the source here), is in no way production quality, and handles:
- Basic validation
- Basic data sanitization
- Very simple persistence using a user
$_SESSION. This means that a comment saved by one user will not be available to another user.
This also means that we don’t need to spend time setting up a database and all that goes with it and makes post_comment.php very simple an clean. If you wanted to use this functionality in a production environment you would need to re-write the contents of Persistence.php. Here’s the code for post_comment.php.
<?php
require('Persistence.php');

$db = new Persistence();
if( $db->add_comment($_POST) ) {
  header( 'Location: index.php' );
}
else {
  header( 'Location: index.php?error=Your comment was not posted due to errors in your form submission' );
}
?>
The above code does the following:
- Includes the Persistence.php class which handles saving and fetching comments.
- Creates a new instances of the
Persistenceobject and assigns it to the variable$db. - Tries to add the comment to the
$db. If the comment is successfully added it redirects back to the blog post. If it fails the redirection also occurs but some error text is appended to an error query parameter.
Displaying the Comments with the Blog Post
The final thing we need to do to have our Generic Blog Commenting System up and running is to update the blog page, index.php, to fetch and display the comments from the Persistence object.
- Since this isn’t a real blogging system we’ll hard code the
$comment_post_IDvalue to be1. - Include the Persistence.php class and fetch the comments from it. Comments are associated with a blog post using a unique
$comment_post_ID.
<?php
require('Persistence.php');
$comment_post_ID = 1;
$db = new Persistence();
$comments = $db->get_comments($comment_post_ID);
$has_comments = (count($comments) > 0);
?>
Since we now have the $comment_post_ID accessible via PHP we should update the HTML for the comment form to use this value.
<input type="hidden" name="comment_post_ID" value="<?php echo($comment_post_ID); ?>" id="comment_post_ID" />We now have all the comments related to the blog post referenced by the $comments variable we need to display them on the page. To do this we need to update the PHP in index.php to iterate through them and create the required HTML.
<ol id="posts-list" class="hfeed<?php echo($has_comments?' has-comments':’); ?>">
  <li class="no-comments">Be the first to add a comment.</li>
  <?php
    foreach ($comments as $comment) {
      ?>
      <li><article id="comment_<?php echo($comment['id']); ?>" class="hentry">
        <footer class="post-info">
          <abbr class="published" title="<?php echo($comment['date']); ?>">
            <?php echo( date('d F Y', strtotime($comment['date']) ) ); ?>
          </abbr>

          <address class="vcard author">
            By <a class="url fn" href="#"><?php echo($comment['comment_author']); ?></a>
          </address>
        </footer>

        <div class="entry-content">
          <p><?php echo($comment['comment']); ?></p>
        </div>
      </article></li>
      <?php
    }
  ?>
</ol>
You’ll notice that if the value of $has_comments is true an additional CSS class is applied to the ordered list called has-comments. This is so we can hide the list item with the “Be the first to add a comment” message when comments are being displayed using CSS:
#posts-list.has-comments li.no-comments {
  display: none;
}
Now that all this is in place we have a functional blog commenting system. If you would like to start writing your code from this basic functioning blog commenting system you can also download the code completed up to here.
Progressive Enhancement With jQuery
The first step in making our blog commenting system feel less like a Web page and more like an application is to stop page reloads when a user submits a comment. We can do this by submitting the comments to the server using an AJAX request. Since jQuery is probably the defacto standard for cross browser JavaScript functionality we’ll use it here. Although I’m using jQuery here, I’d also like to highlight that it’s a good idea to not always use jQuery. Instead, analyze your scenario and make a considered decision because there are some cases where you are best not to.
In an attempt to try and keep as much scripting (PHP and JavaScript) from the index.php file we’ll create a new folder for our JavaScript and in there a file for our application JavaScript. The path to this fill should be js/app.js. This file should be included after the jQuery include.
<script src="https://code.jquery.com/jquery-1.7.1.min.js"></script>
<script src="js/app.js"></script>
Capture the Comment Form Submission
When the page is ready bind to the submit event of the form.
$(function() {
  $('#commentform').submit(handleSubmit);
});
When the form is submitted and the handleSubmit function is called the comment data we want to send to the server is extracted from the form. There are more elegant ways of fetching the data from the form but this approach clearly shows where we’re getting the values from and the data object we are creating.
function handleSubmit() {
  var form = $(this);
  var data = {
    "comment_author": form.find('#comment_author').val(),
    "email": form.find('#email').val(),
    "comment": form.find('#comment').val(),
    "comment_post_ID": form.find('#comment_post_ID').val()
  };

  postComment(data);

  return false;
}

function postComment(data) {
  // send the data to the server
}
POST the Comment with AJAX
Within the postComment function make a POST request to the server passing the data that we’ve retrieved from the form. When the request is made an additional HTTP header will be sent to identify the request as being an AJAX request. We want to do this so that we can return a JSON response if it is an AJAX request and maintain our basic functionality if it isn’t (for more information on this see Detected AJAX events on the Server). We also define two handlers; postSuccess for handling the comment being successfully stored and postError to handle any failures.
function postComment(data) {
  $.ajax({
    type: 'POST',
    url: 'post_comment.php',
    data: data,
    headers: {
      'X-Requested-With': 'XMLHttpRequest'
    },
    success: postSuccess,
    error: postError
  });
}

function postSuccess(data, textStatus, jqXHR) {
  // add comment to UI
}

function postError(jqXHR, textStatus, errorThrown) {
  // display error
}
Dynamically Updating the User Interface with the Comment
At this point the comment data is being sent to the server and saved, but the AJAX response isn’t providing any meaningful response. Also, the comments section isn’t being updated to show the newly submitted comment so the user would have to refresh the page to see it. Let’s start by writing the code to update the UI and test that functionality.
If you are thinking “Hang on a minute! We don’t have all the data we need from the Web server to display the comment” then you are correct. However, this doesn’t stop us writing the code to update the UI and also testing that it works. Here’s how:
function postSuccess(data, textStatus, jqXHR) {
  $('#commentform').get(0).reset();
  displayComment(data);
}

function displayComment(data) {
  var commentHtml = createComment(data);
  var commentEl = $(commentHtml);
  commentEl.hide();
  var postsList = $('#posts-list');
  postsList.addClass('has-comments');
  postsList.prepend(commentEl);
  commentEl.slideDown();
}

function createComment(data) {
  var html = ’ +
  '<li><article id="' + data.id + '" class="hentry">' +
    '<footer class="post-info">' +
      '<abbr class="published" title="' + data.date + '">' +
        parseDisplayDate(data.date) +
      '</abbr>' +
      '<address class="vcard author">' +
        'By <a class="url fn" href="#">' + data.comment_author + '</a>' +
      '</address>' +
    '</footer>' +
    '<div class="entry-content">' +
      '<p>' + data.comment + '</p>' +
    '</div>' +
  '</article></li>';

  return html;
}

function parseDisplayDate(date) {
  date = (date instanceof Date? date : new Date( Date.parse(date) ) );
  var display = date.getDate() + ' ' +
                ['January', 'February', 'March',
                 'April', 'May', 'June', 'July',
                 'August', 'September', 'October',
                 'November', 'December'][date.getMonth()] + ' ' +
                date.getFullYear();
  return display;
}
The code above does the following:
- Within the
postSuccessfunction we clear the form values and calldisplayComment. displayCommentfirst calls thecreateCommentfunction to create the list item (<li>) HTML as aString.- We then convert the HTML to a jQuery object using
$(commentHtml)and hide the element. - The comment list item is then prepended to the comments ordered list (
<ol>). The list also has a class called has-comments added to it so we can hide the first list item which contains the “Be the first to comment” statement. - Finally, we call
commentEl.slideDown()so that the comment is shown in what is becoming the standard “here’s a new item” way.
The functionality is now implemented but we want to test it out. This can be achieved in two ways:
- The
displayCommentis a global function so we can call it directly using the JavaScript console of the browser. - We can bind to an event on the page that triggers a fake update which calls the
displayCommentfunction
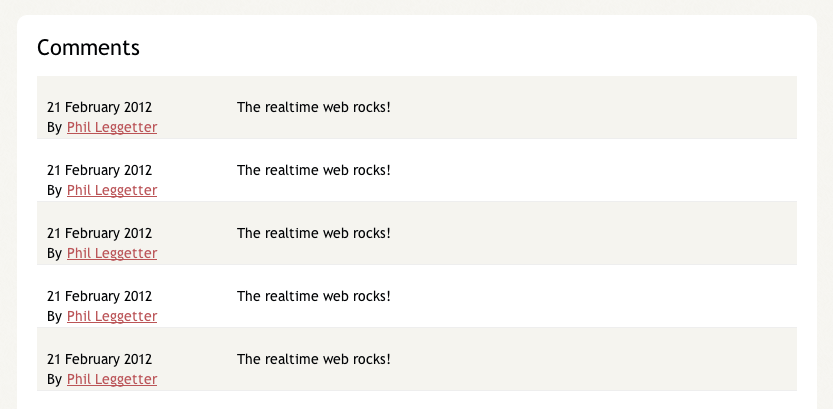
Let’s go with the latter and bind to the “u” key being released by binding to the keyup event. When it is, we’ll create a fake data object containing all the information required to create a new comment and pass it to the displayComment function. That comment will then be displayed in the UI.
Hit the “u” key a few times and see the comments appear.
$(function() {

  $(document).keyup(function(e) {
    e = e || window.event;
    if(e.keyCode === 85){
      displayComment({
        "id": "comment_1",
        "comment_post_ID": 1,
        "date":"Tue, 21 Feb 2012 18:33:03 +0000",
        "comment": "The realtime Web rocks!",
        "comment_author": "Phil Leggetter"
      });
    }
  });

});
Great! We now know that our displayComment function works exactly as we expect it to. Remember to remove the test function before you go live or you’ll really confuse your user every time they press “u”.
Detect and Responding to the AJAX request
All that’s left to do is update the post_comment.php file to detect the AJAX call and return information about the newly created comment.
Detecting the AJAX request is done by checking for the X-Requested-With header:
$ajax = ($_SERVER[ 'HTTP_X_REQUESTED_WITH' ] === 'XMLHttpRequest');Once we know the request is an AJAX request we can update the code to respond with an appropriate status code and the data representing the comment. We also need to ensure that the original functionality is maintained. The post_comment.php code now looks as follows:
<?php
require('Persistence.php');

$ajax = ($_SERVER[ 'HTTP_X_REQUESTED_WITH' ] === 'XMLHttpRequest');

$db = new Persistence();
$added = $db->add_comment($_POST);

if($ajax) {
  sendAjaxResponse($added);
}
else {
  sendStandardResponse($added);
}

function sendAjaxResponse($added) {
  header("Content-Type: application/x-javascript");
  if($added) {
    header( 'Status: 201' );
    echo( json_encode($added) );
  }
  else {
    header( 'Status: 400' );
  }
}

function sendStandardResponse($added) {
  if($added) {
    header( 'Location: index.php' );
  }
  else {
    header( 'Location: index.php?error=Your comment was not posted due to errors in your form submission' );
  }
}
?>
Key points from the above code are:
- The
$db->add_comment($_POST)call returns the data from the added comment which is assigned to the$addedvariable. - By setting the response Content-Type to “application/json” we tell jQuery to convert the returned string into a JavaScript object. For more information on calling JSON Web services see A Beginner’s Guide To jQuery-Based JSON API Clients.
- The 201 status code indicates a successful call and also that a resource (the comment) was created by the call.
The blog commenting system now works in a much more dynamic way, instantly showing the user that their comment has been posted without refreshing the page. In addition, the way the we’ve added the JavaScript based functionality to the page means that if JavaScript is disabled or a JavaScript file fails to load that the system will fallback to the standard functionality we first implemented.
Getting Real-Time—Finally!
As with any “from scratch” tutorial it can take a bit of time to get to the really interesting part, but we’re finally here. However, all the work we’ve up in has been worth it. Because we’ve built our commenting system up in a progressively enhanced way, plugging Pusher into it is going to be really easy
What is Pusher?
At the start of the tutorial we said that we would use Pusher to add the realtime functionality to the application. But what is Pusher?
Pusher is a hosted service for quickly and easily adding realtime features into Web and mobile applications. It offers a RESTful API that makes it really easy to publish events from any application that can make a HTTP request and a WebSocket API for realtime bi-directional communication. You don’t even need to use the APIs directly as there are server (PHP, Ruby, node.js, ASP.NET, Python and more) and client (JavaScript, iOS, Android, .NET, ActionScript, Arduino and more) libraries available in a host of technologies which means you can add realtime functionality to an app within minutes ‐ I’m confident you’ll be surprised just how easy!
Sign up for Pusher and get your API Credentials
In order to add Pusher-powered real-time functionality to a Web application you first need to sign up for a free Sandbox account. After you have signed up you’ll be taken to the Pusher dashboard where you’ll see that a “Main” application has been created for you. You’ll also see you are in the “API Access” section for that application where you can grab your API credentials.

For ease of access create a pusher_config.php file and define the credentials in there so we can refer to them later:
<?php
define('APP_ID', 'YOUR_APP_ID');
define('APP_KEY', 'YOUR_APP_KEY');
define('APP_SECRET', 'YOUR_APP_SECRET');
?>
In your version of pusherconfig.php be sure to replace the values which being ‘YOUR with your actual credentials.
You should also require this in your index.php file. We should also make the APP_KEY available to the JavaScript runtime as we are going to need it to connect to Pusher.
<?php
require('pusher_config.php);
?>

<script>
var APP_KEY = '<?php echo(APP_KEY); ?>';
</script>
Real-time JavaScript
The first thing you need to do when adding Pusher to a Web application is include the Pusher JavaScript library and connect to Pusher. To connect you’ll need to use the key which you grabbed from the Pusher dashboard. Below you can see all that is required to hook up the front-end application to Pusher.
Include the Pusher JavaScript library after the app.js include:
<script src="https://code.jquery.com/jquery-1.7.1.min.js"></script>
<script src="https://js.pusher.com/1.11/pusher.min.js"></script>
<script src="js/app.js"></script>
Add the Pusher functionality to app.js:
var pusher = new Pusher(APP_KEY);
var channel = pusher.subscribe('comments-' + $('#comment_post_ID').val());
channel.bind('new_comment', displayComment);
This probably looks too easy to be true, so here are the details about what the above code does:
var pusher = new Pusher(APP_KEY);Creates a new instance of aPusherobject and in doing so connects you to Pusher. The application to use is defined by theAPP_KEYvalue that you pass in and that we set up earlier.var channel = pusher.subscribe('comments-' + $('#comment_post_ID').val());Channels provide a great way of organizing streams of real-time data. Here we are subscribing to comments for the current blog post, uniquely identified by the value of thecomment_post_IDhidden form input element.channel.bind('new_comment', displayComment);Events are used to further filter data and are ideal for linking updates to changes in the UI. In this case we want to bind to an event which is triggered whenever a new comment is added and display it. Because we’ve already created thedisplayCommentfunction we can just pass in a reference to the call tobind.
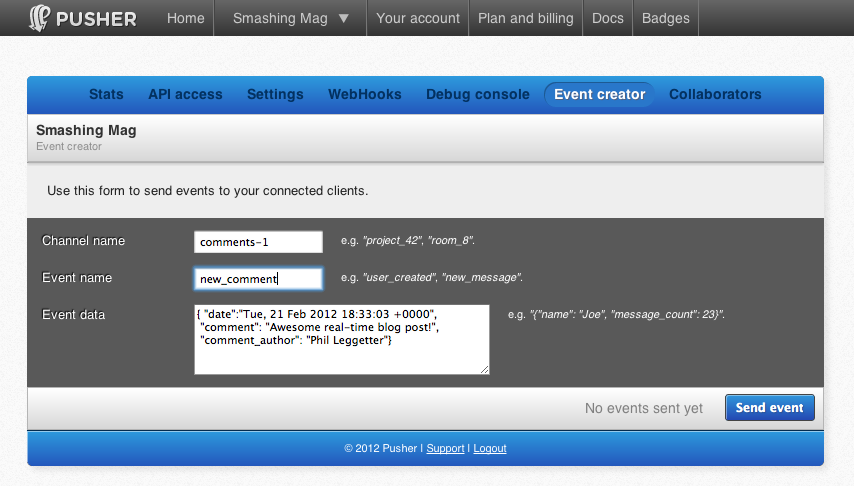
Sending Real-Time Events using the Event Creator
We can also test out this functionality without writing any server-side code by using the Event Creator for your app which can also be found in the Pusher dashboard. The Event Creator lets you publish events on a channel through a simple user interface. From the code above we can see that we want to publish an event named “new_comment” on the “comments-1” channel. From the earlier test function we also have an example of the test data we can publish.
Real-time PHP
Again, we’ve proven that our client-side functionality works without having to write any server-side code. Now lets add the PHP code we need to trigger the new comment event as soon as a comment is posted in our comment system.
Pusher offers a number of server-side libraries which make it easy to publish events in addition to helping with functionality such as private channel authentication and providing user information for presence channels. We just want to use the basic event triggering functionality in the post_comment.php file so we need to download the Pusher PHP library.
Once you’ve downloaded this zip file, unzip it into the directory along with your other files. Your file structure will now look something like this:
- index.php
- css (dir)
- images (dir)
- post_comment.php
- pusher_config.php
- Persistence.php
- squeeks-Pusher-PHP (dir)
- lib (dir)
- Pusher.php
- lib (dir)
An event can be triggering in just a few lines of code:
<?php
require('squeeks-Pusher-PHP/lib/Pusher.php');
require('pusher_config.php');

$pusher = new Pusher(APP_KEY, APP_SECRET, APP_ID);
$pusher->trigger('comments-1', 'new_comment', array(
  "comment_post_ID" => 1,
  "date" => "Tue, 21 Feb 2012 18:33:03 +0000",
  "comment" => "The realtime Web rocks!",
  "comment_author" => "Phil Leggetter"
));
?>
However, we need to apply a some additional logic before we trigger the event:
- Check that the comment was added.
- Extract the unique comment identifier from the
$addedarray. - Build the text to identify a channel name for the submitted comment.
- Trigger a _newcomment event on the channel with the
$addeddata. Note: The library automatically converts the$addedarray variable to JSON to be sent through Pusher.
Therefore the full post_comment.php file ends up looking as follows:
<?php
require('Persistence.php');
require('squeeks-Pusher-PHP/lib/Pusher.php');
require('pusher_config.php');

$ajax = ($_SERVER[ 'HTTP_X_REQUESTED_WITH' ] === 'XMLHttpRequest');

$db = new Persistence();
$added = $db->add_comment($_POST);

if($added) {
  $channel_name = 'comments-' . $added['comment_post_ID'];
  $event_name = 'new_comment';

  $pusher = new Pusher(APP_KEY, APP_SECRET, APP_ID);
  $pusher->trigger($channel_name, $event_name, $added);
}

if($ajax) {
  sendAjaxResponse($added);
}
else {
  sendStandardResponse($added);
}

function sendAjaxResponse($added) {
  header("Content-Type: application/json");
  if($added) {
    header( 'Status: 201' );
    echo( json_encode($added) );
  }
  else {
    header( 'Status: 400' );
  }
}

function sendStandardResponse($added) {
  if($added) {
    header( 'Location: index.php' );
  }
  else {
    header( 'Location: index.php?error=Your comment was not posted due to errors in your form submission' );
  }
}
?>
If you run the app now in two different browser windows you’ll see that as soon as you submit a comment in one window that comment will instantly (“magically”) appear in the second window. We now have a real-time commenting system!
But…, we’re not done quite yet. You’ll also see that the comment is shown twice in the window of the user who submitted it. This is because the comment has been added by the AJAX callback, and by the Pusher event. Because this is a very common scenario, especially if you’ve built an application in a progressively enhanced way as we have, the Pusher server libraries expose a way of excluding a connection/user from receiving the event via Pusher.
In order to do this you need to send a unique connection identifier called a socket_id from the client to the server. This identifier can then be used to define who will be excluded.
function handleSubmit() {
  var form = $(this);
  var data = {
    "comment_author": form.find('#comment_author').val(),
    "email": form.find('#email').val(),
    "comment": form.find('#comment').val(),
    "comment_post_ID": form.find('#comment_post_ID').val()
  };

  var socketId = getSocketId();
  if(socketId !== null) {
    data.socket_id = socketId;
  }

  postComment(data);

  return false;
}

function getSocketId() {
  if(pusher && pusher.connection.state === 'connected') {
    return pusher.connection.socket_id;
  }
  return null;
}
The changes we’ve made are:
- A new function called
getSocketIdhas been added to get thesocket_id. It wraps a check to ensure that thepushervariable has been set and also that the client is connected to Pusher. - The
handleSubmithas been updated to check to see if asocket_idis available. If it is, this information is posted to the server along with the comment data.
On the server we need to use the socket_id parameter if it is present and therefore exclude the connection and user who submitted the comment, or pass in null if it’s not:
$channel_name = 'comments-' . $added['comment_post_ID'];
$event_name = 'new_comment';
$socket_id = (isset($_POST['socket_id'])?$_POST['socket_id']:null);

$pusher = new Pusher(APP_KEY, APP_SECRET, APP_ID);
$pusher->trigger($channel_name, $event_name, $added, $socket_id);
And as simple as that we have a fully realtime enabled blog commenting system and we only send messages to users who really need to see them. As with the AJAX functionality the realtime functionality has been added in a progressively enhancing way, to ensure it doesn’t impact on any other functionality. You can find the a demo running here and the completed solution in the realtime commenting repository in github.
Good Real-Time App Development Practices
Real-time application development shares common good development practices with general Web development. However, I thought I would share a couple of tips that can come in particularly handy.
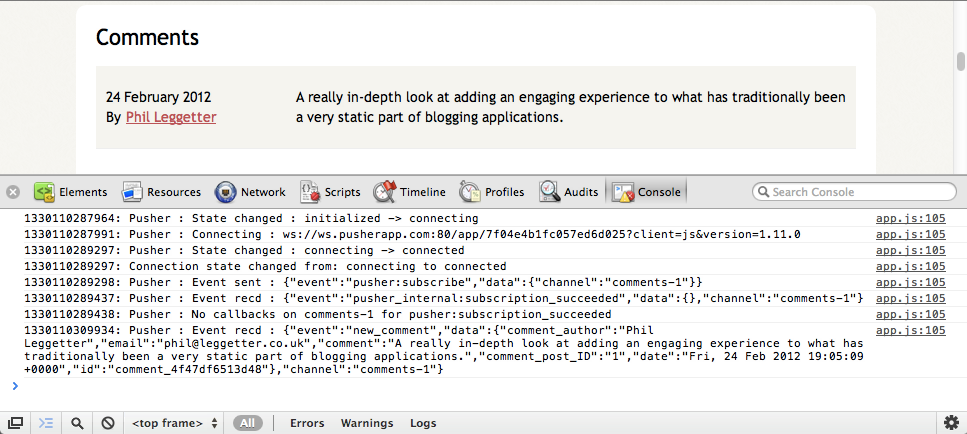
Use Browser Developer Tools
When you start doing a lot of JavaScript development the browser developer tools becomes your best friend. It’s the same when adding realtime functionality to your Web app, not only because you are using JavaScript, but also because the JavaScript library you are using is likely to be doing some reasonably complex things internally. So, the best way of understanding what is going on and if your code is using it as expect is to enable logging which usually goes to the developer console. All major browser vendors now offer good developer tools which include a console:
- Firebug addon for Firefox
- Internet Explorer F12 developer tools
- Opera Dragonfly
- Safari Developer Tools
The Pusher JavaScript library provides a way to hook into the logging functionality. All you need to do is assign a function to the Pusher.log static property. This function will then receive all log messages. You can do what you like within the function but best practice is to log the messages to the developer console. You can do this as follow, ensuring the code it executed after the Pusher JavaScript library include:
Pusher.log = function(msg) {
  if(window.console && window.console.log) {
    window.console.log(new Date().getTime() + ': ' + msg);
  }
};
The code above checks to make sure the console and log function is available - it’s not in older browsers - and then logs the messages along with a timestamp to the JavaScript console. This can be incredibly handy in tracking down problems.
Check Connectivity
Any good real-time technology will maintain a persistent connection between the client (web browser) and the Web server or service. Sometimes the client will lose connectivity and when the client isn’t connected to the Internet the real-time functionality won’t work. This can happen a lot with applications running on mobile devices which rely on mobile networks. So, if your application relies on that connectivity and functionality then it’s important to deal with scenarios where the client isn’t connected. This might be by displaying a message to tell the user they are offline or you might want to implement some alternative functionality.
The Pusher JavaScript library exposes connectivity state via the pusher.connection object, which we briefly saw earlier when fetching the socket_id. Binding to state changes and implementing your required functionality is quite simple as it follows the same mechanism as binding to events on channels:
var pusher = new Pusher(APP_KEY);

pusher.connection.bind('state_change', function(states) {
  Pusher.log('Connection state changed from: ' + states.previous + ' to ' + states.current);
});
Conclusion
We’re seeing real-time functionality appearing in a large number of high profile applications: some have it at the core of what they offer whilst others use it sparingly. No matter how it is used the end goal is generally the same; to enhance the user experience and keep users engaged with an application. By converting a basic blog commenting system into a more engaging communication platform I hope I’ve demonstrated that the functionality and experience can easily be layered on existing application.
The ease of access to this technology is a relatively new thing and we’ve only just touched the potential uses for the technology. Real-time stats, instant news updates, activity streams, social interaction, collaboration and gaming are just a few common uses but as more developers become aware of, and comfortable with, the technology I’m confident that we’re going to see some truly amazing innovation. An “Internet of Real-Time Things?”?


