An Introduction To LESS: LESS vs Sass

Email Newsletter
Weekly tips on front-end & UX.
Trusted by 200,000+ folks.
 Performance issues happen. Bring your bugs and slowdowns and Sentry will do the rest.


 Flexible CMS. Headless & API 1st
I’ve been using LESS religiously ever since I stumbled upon it months ago. CSS was never really a problem for me, in and of itself, but I was intrigued by the idea of using variables to create something along the lines of a color palette for my websites and themes.
Having a color palette with a fixed number of options to choose from helps prevent me from going color crazy and deviating from a chosen style.
As it turns out, LESS — and Sass for that matter — are so much more than that. LESS and Sass share a lot of similarities in syntax, including the following:
- Mixins -. Classes for classes.
- Parametric mixins -. Classes to which you can pass parameters, like functions.
- Nested Rules -. Classes within classes, which cut down on repetitive code.
- Operations -. Math within CSS.
- Color functions -. Edit your colors.
- Namespaces -. Groups of styles that can be called by references.
- Scope -. Make local changes to styles.
- JavaScript evaluation -. JavaScript expressions evaluated in CSS.
LESS Vs Sass
The main difference between LESS and Sass is the way in which they are processed. LESS is a JavaScript library and is, therefore, processed client-side.
Sass, on the other hand, runs on Ruby and is processed server-side. A lot of developers might not choose LESS because of the additional time needed for the JavaScript engine to process the code and output the modified CSS to the browser. There are a few ways around this. The way I get around it is to use LESS only during the development process. Once I’m finished, I copy and paste the LESS output into a minifier and then into a separate CSS file to be included in place of the LESS files. Another option is to use LESS.app to compile and minify your LESS files. Both options will minimize the footprint of your styles, as well as avoid any problems that might result from the client’s browser not running JavaScript. While this is not likely, it’s always a possibility.
Update: The statement above has caused quite a heated discussion and debate in comments and on Twitter. Please also consider the reply by Adam Stacoviak: “The reality is that Sass does require Ruby, however it does not need to be compiled to CSS on the server. It can be compiled locally (just as LESS has mentioned for itself) and the compiled CSS can be shipped with your project, WordPress theme, Expression Engine template, or whatever to the server just like your previous CSS files. Since this is Smashing Magazine and the readership could vary dramatically, I would guess that a large portion of you reading this comment are running a Mac. Well, Ruby is provided by default on all Macs so getting Sass installed and running is just a command away (sudo gem install sass).
Once you have Sass installed you can compile Sass locally into CSS and ship the code with your project as I mentioned. If you’re unsure on how to get started with Sass (or Compass) we’ve written a fairly thorough guide on the matter titled, “Getting Started with Sass and Compass.” Thanks for clearing it up, Adam!
LESS Is More
Installation
Including LESS in something that you’re building is about as easy as it gets:
- Go get yourself a copy of less.js;
- Create a file to put your styles in, such as style.less;
- Add the following code to your HTML’s
<head>:
<link rel="stylesheet/less" type="text/css" href="styles.less">
<script src="less.js" type="text/javascript"></script>
Note the rel attribute of the link. You are required to append the /less to the end of the value in order for LESS to work. You are also required to include the script immediately after the link to the style sheet. If you’re using HTML5 syntax, and I can’t imagine why you wouldn’t be, you can leave out the type=“text/css” and the type=“text/javascript”.
There’s also a server-side version of LESS. The easiest way to install LESS on the server is with Node Package Manager (NPM).
Variables
If you’re a developer, variables are one of your best friends. In the event that you’ll be using information repeatedly (in this case, a color), setting it to a variable makes sense. This way, you guarantee yourself consistency and probably less scrolling about looking for a hex value to copy and paste. You can even do some fun little adding and subtracting of hex values that you want to render. Take this example:
@blue: #00c;
@light_blue: @blue + #333;
@dark_blue: @blue - #333;
If we apply these styles to three divs, we can see the gradated effect created by adding and subtracting the hex values to and from the original blue:
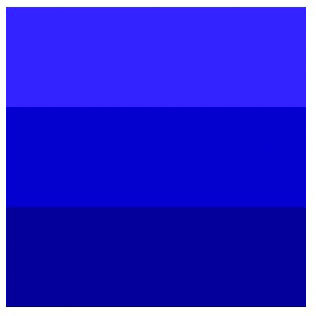
The only difference in variables between LESS and Sass is that, while LESS uses @, Sass uses $. There are some scope differences as well, which I’ll get to shortly.
Mixins
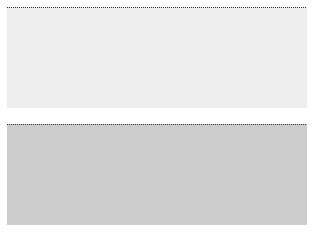
On occasion, we might create a style that’s intended to be used repeatedly throughout the style sheet. Nothing is stopping you from applying multiple classes to the elements in the HTML, but you could also do this without ever leaving your style sheet, using LESS. To illustrate this, I have pasted some sample code that one might use to style two elements on the page.
.border {
border-top: 1px dotted #333;
}

article.post {
background: #eee;
.border;
}

ul.menu {
background: #ccc;
.border;
}
This will give you something similar to what you would get if you had gone back to the HTML file and added the .bordered class to the two elements there — except you’ve done it without leaving the style sheet. And it works just as well:
With Sass, you declare @mixin prior to the style to identify it as a mixin. Later, you declare @include to call it.
@mixin border {
border-top: 1px dotted #333;
}

article.post {
background: #eee;
@include border;
}

ul.menu {
background: #ccc;
@include border;
}
Parametric Mixins
Like having functions in your CSS (swoon), these can be immensely useful for those seemingly redundant tasks of modern-day CSS. The best and most useful example of their use relates to the many vendor prefixes that we struggle with during this transition from CSS2 to CSS3. Nettuts+ has a wonderful webcast and article by Jeffrey Way, with details on including a file consisting entirely of useful parametric mixins that cover most of your favorite CSS3 properties in the respective vendor prefixes. For example, a simple mixin to handle rounded corners in their various forms:
.border-radius( @radius: 3px ) {
-webkit-border-radius: @radius;
-moz-border-radius: @radius;
border-radius: @radius;
}
In this case, the .border-radius class has a default radius of 3 pixels, but you can pass whatever value you like to get a rounded corner of that radius. Something like .border-radius(10px) will round the corners by 10 pixels.
The syntax in Sass is very similar to that of LESS. Just use the $ for variables, and call the mixins with the @mixin and @include method mentioned earlier.
Selector Inheritance
Here’s something not provided in LESS. With this ability, you can append a selector to a previously established selector without the need to add it in a comma-separated format.
.menu {
    border: 1px solid #ddd;
}

.footer {
    @extend .menu;
}

/* will render like so: */
.menu, .footer {
    border: 1px solid #ddd;
}
Nested Rules
Nesting classes and ids in CSS can be one of the only methods to keep your styles from interfering with and from being interfered with any other styles that may be added along the way. But this can get very messy. Using a selector like #site-body .post .post-header h2 is unappealing and takes up a lot of unnecessary space. With LESS, you can nest ids, classes and elements as you go. Using the example above, you could do something like this:
#site-body { …

    .post { …

        .post-header { …

            h2 { … }

            a { …

                &:visited { … }
                &:hover { … }
            }
        }
    }
}
The above code is essentially the same as the ugly selector in the previous paragraph, but it’s much easier to read and understand, and it takes up much less space. You can also refer in element styles to their pseudo-elements by using the &, which in this case functions similar to this in JavaScript.
Operations
This is about what you would expect: using fixed numbers or variables to perform mathematical operations in your styles.
@base_margin: 10px;
@double_margin: @base_margin * 2;

@full_page: 960px;
@half_page: @full_page / 2;
@quarter_page: (@full_page / 2) / 2;
For the record, I am aware that I could have also divided by four to get the @quarter_page variable, but I wanted to illustrate that the parentheses rule from the “order of operations” also applies. Parentheses are also required if you’re going to perform operations within compound properties; for example, border: (@width / 2) solid #000.
Sass is a lot more versatile with numbers than LESS. It has built into it conversion tables to combine comparable units. Sass can work with unrecognized units of measurement and print them out. This feature was apparently introduced in an attempt to future-proof the library against changes made by the W3C.
/* Sass */
2in + 3cm + 2pc = 3.514in

/* LESS */
2in + 3cm + 2pc = Error
Color Functions
Earlier, I mentioned how LESS helps me stick to a color scheme in my coding process. One of the parts that contributes to this the most is the color function. Suppose you use a standard blue throughout your styles, and you want to use this color for a gradated “Submit” button in a form. You could go into Photoshop or another editor to get the hex value for a slightly lighter or darker shade than the blue for the gradient. Or you could just use a color function in LESS.
@blue: #369;

.submit {
    padding: 5px 10px;
    border: 1px solid @blue;
    background: -moz-linear-gradient(top, lighten(@blue, 10%), @blue 100%); /*Moz*/
    background: -webkit-gradient(linear, center top, center bottom, from(lighten(@blue, 10%)), color-stop(100%, @blue)); /*Webkit*/
    background: -o-linear-gradient(top, lighten(@blue, 10%) 0%, @blue 100%); /*Opera*/
    background: -ms-linear-gradient(top, lighten(@blue, 10%) 0%, @blue 100%); /*IE 10+*/
    background: linear-gradient(top, lighten(@blue, 10%) 0%, @blue 100%); /*W3C*/
    color: #fff;
    text-shadow: 0 -1px 1px rgba(0,0,0,0.4);
}
The lighten function literally lightens the color by a percentage value. In this case, it will lighten the base blue by 10%. This method enables us to change the color of gradated elements and any other elements with that color simply by changing the base color itself. This could prove immensely helpful in theming. Plus, if you used a parametric function, like the ones listed above, you could alleviate some of that browser-prefix tedium with something as simple as .linear-gradient(lighten(@blue), @blue, 100%);.
Either way, you get an effect that’s rather nice:
![]()
Our nicely gradated, variable-based “Submit” button.
There are a lot of other color functions for darkening and saturating colors and even spinning the color wheel to other colors. I recommend trying them out to see what you can come up with.
Sass seems to have a lot more color options — not that I would need them all. Lighten and darken are the only ones that I see myself using often. For more detail, Nex3 has an in-depth article on the topic.
Conditionals And Control
This is rather nifty, and another thing not provided by LESS. With Sass, you have the ability to use if { } else { } conditional statements, as well as for { } loops. It supports and, or and not, as well as the <, >, <=, >= and == operators.
/* Sample Sass "if" statement */
@if lightness($color) > 30% {
  background-color: #000;
} @else {
  background-color: #fff;
}

/* Sample Sass "for" loop */
@for $i from 1px to 10px {
  .border-#{i} {
    border: $i solid blue;
  }
}
Namespaces
Namespaces can be used to add another level of organization to our CSS, by allowing us to create groups of commonly used styles and then pick from them along the way. For instance, if we created a group of styles called defaults, we could pull from this group when we come across an element that needs it.
#defaults {
    .nav_list () {
        list-style: none;
        margin: 0; padding: 0;
    }
    .button () { … }
    .quote () { … }
}
Later, in our code, if we come across a ul element within a nav element, we would know that we’ll need our default style. So, we can simply call it, and it will be applied.
nav ul {
    #defaults > .nav_list;
}
Scope
Scoping is standard throughout programming and thus standard in LESS. If you define a variable at the root level of your style sheet, it will be available and consistent throughout the document. If, however, you redefine the variable from within a selector such as an id or class, then it will be available — with the new value — only within that selector.
@color: #00c; /* blue */

#header {
    @color: #c00; /* red */

    border: 1px solid @color; /* will have a red border */
}

#footer {
    border: 1px solid @color; /* will have a blue border */
}
Because we’ve restated the variable within the #header selector, the value for that variable will be different and will apply only within that selector. Anything before or after it will retain the value of the original statement.
Scope is handled a little differently in Sass. In the above code, when the @color variable is changed to red, it will be interpreted as such from that point on within the code.
Comments
This part is pretty basic. Two types of comments are valid in LESS. The standard CSS comment, /* comment */, is valid and will get passed through the processing and outputted. Single-line comments, // comment, work as well but will not get passed and outputted and, as a result, are “silent.”
Importing
Importing is pretty standard, too. The standard @import: ‘classes.less’; works just fine. If, however, you’re importing another LESS file, then the file extension is optional, so @import ‘classes’; would work as well. If you want to import something without LESS processing it, you can use the .css extension (for example, @import: ‘reset.css’;).
String Interpolation
String values can also be used in variables and called within styles via @{name}.
@base_url = 'https://www.smashingmagazine.com';
background-image: url("@{base_url}/images/background.png");
Escaping
There will be times when you need to include a value that is not valid CSS syntax or that LESS doesn’t recognize. More often than not, it will be some crazy Microsoft hack. To avoid throwing errors and breaking LESS, you will need to escape them.
.class {
    filter: ~"progid:DXImageTransform.Microsoft.Alpha(opacity=20)";
}

/* Will actually be outputted like this: */
.class {
    filter: progid:DXImageTransform.Microsoft.Alpha(opacity=20);
}
JavaScript Evaluation
This is one of my favorite parts of LESS: using Javascript in style sheets — simply brilliant. You can use expressions and also reference aspects of the environment using backticks.
@string: `'howdy'.toUpperCase()`; /* @string becomes 'HOWDY' */

/* You can also use the previously mentioned interpolation: */
@string: 'howdy';
@var: ~`'@{string}'.topUpperCase()`; /* becomes 'HOWDY' */

/* Here we access part of the document */
@height = `document.body.clientHeight`;
Output Formatting
Whereas LESS has no output settings, Sass provides four output versions: nested, compact, compressed and expanded.
Final Thoughts
These two libraries share a lot of basics. Both of them are fantastic tools for designers who code, and they can also help developers work more efficiently and quickly. If you’re a fan of Ruby or HAML, then Sass might be right up your ally. For me, being a PHP and JavaScript geek, I tend to lean towards LESS for its ease of inclusion and access to JavaScript’s expressions and document attributes. I doubt that I’ve even come close to truly grasping the possibilities of programming in my style sheets, but I am intent on trying. If you’ve been using either, or both, of these in your work, I’d love to hear more about it and see some of your results. Tips, tricks and corrections are, of course, always welcome as well.
Further Reading
- Using the LESS CSS Preprocessor for Smarter Style Sheets
- The “Other” Interface: Atomic Design With Sass
- Smarter Grids With Sass And Susy
- Extending In Sass Without Creating A Mess


